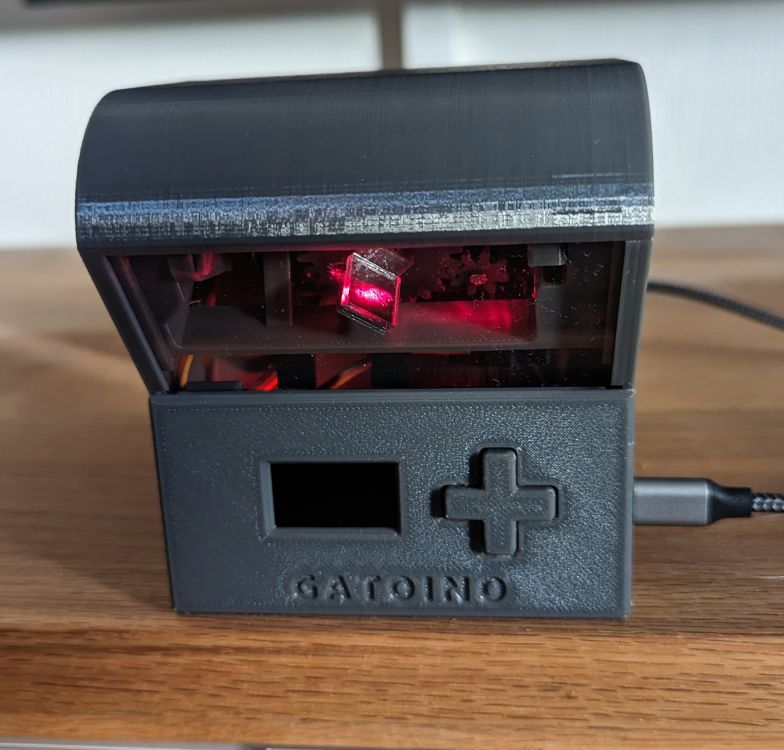
Gatoino – The computer controlled DIY cat laser toy
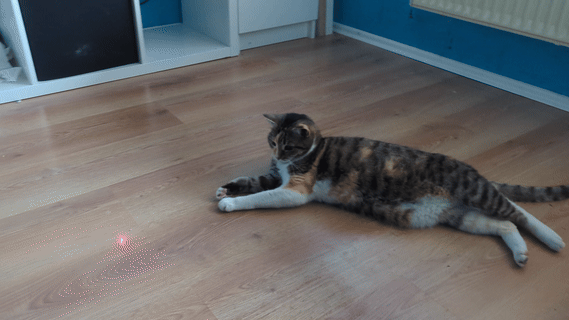
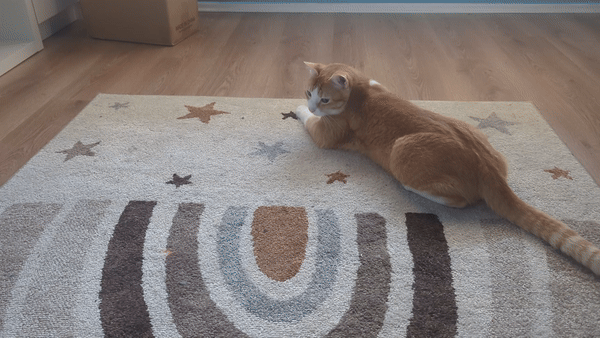
Our cats love their laser pointer but we’re not always around to play with them. Gatoino can run automatically on a customizable schedule. With fully random movement, all 3D printed, easy to solder and assemble,
Most laser toys quickly become a nuisance
Arduino powered and Open Source
Works on shelves and walls
No need for another obstacle on the floor. Gatoino works best with a bit of ground clearance.
Fully randomized movement
Gatoino’s movement is always unpredictable and never gets boring.
Customizable playing field size
Set custom boundaries in all four directions to fit your needs.
Adjustable movement speed
Some like it fast, some need it slow. Laser speed is fully adjustable.
All settings are done with the intuitive on screen menu.
Every cat is different
One long session or shorter and more frequent? Set the duration and frequency of the playing sessions to your cats individual needs.
A beginner and family friendly DIY project
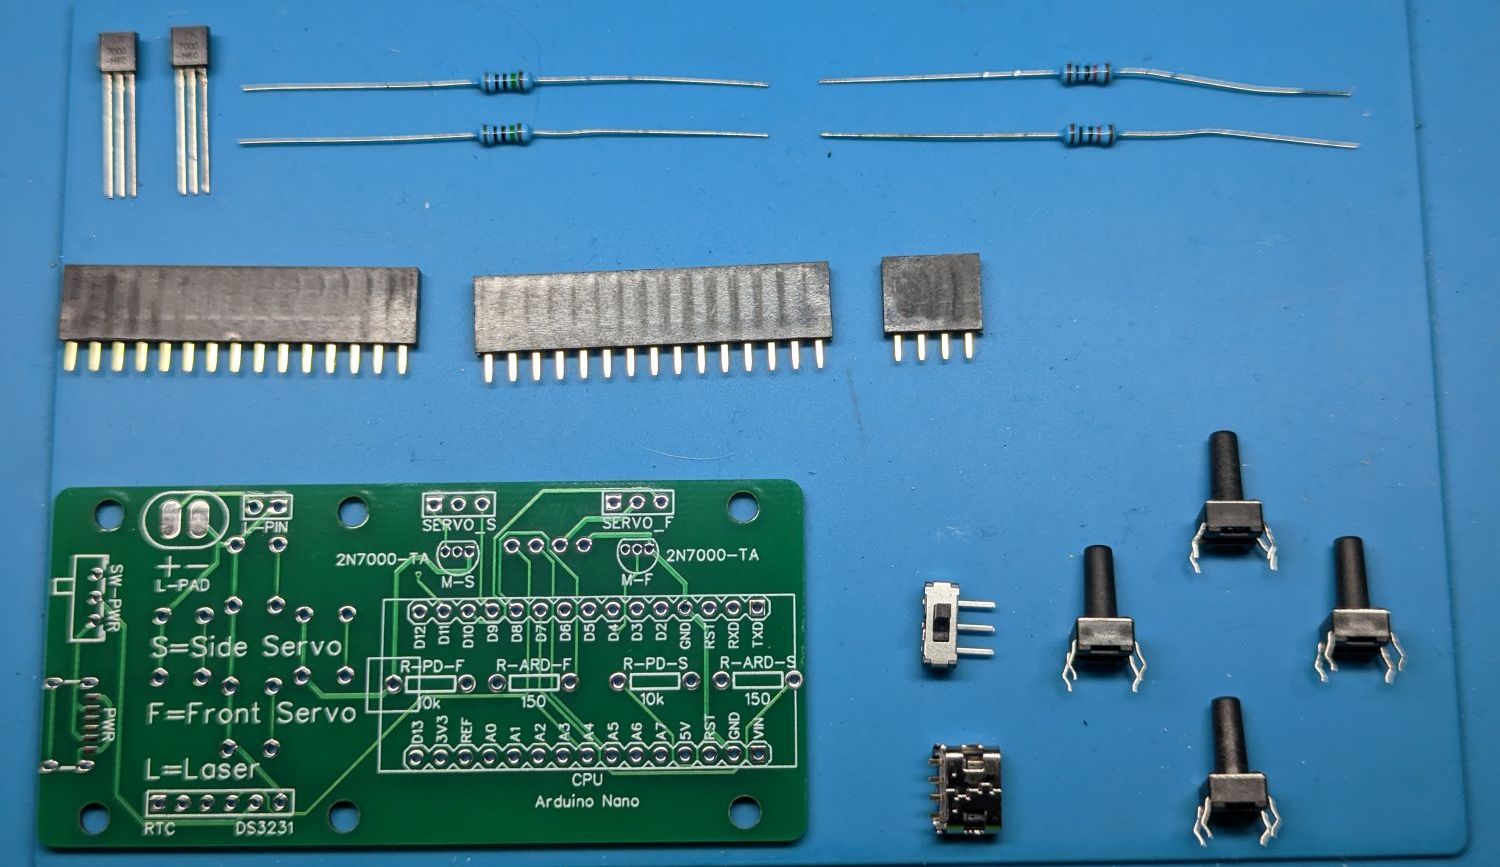
Easy to solder
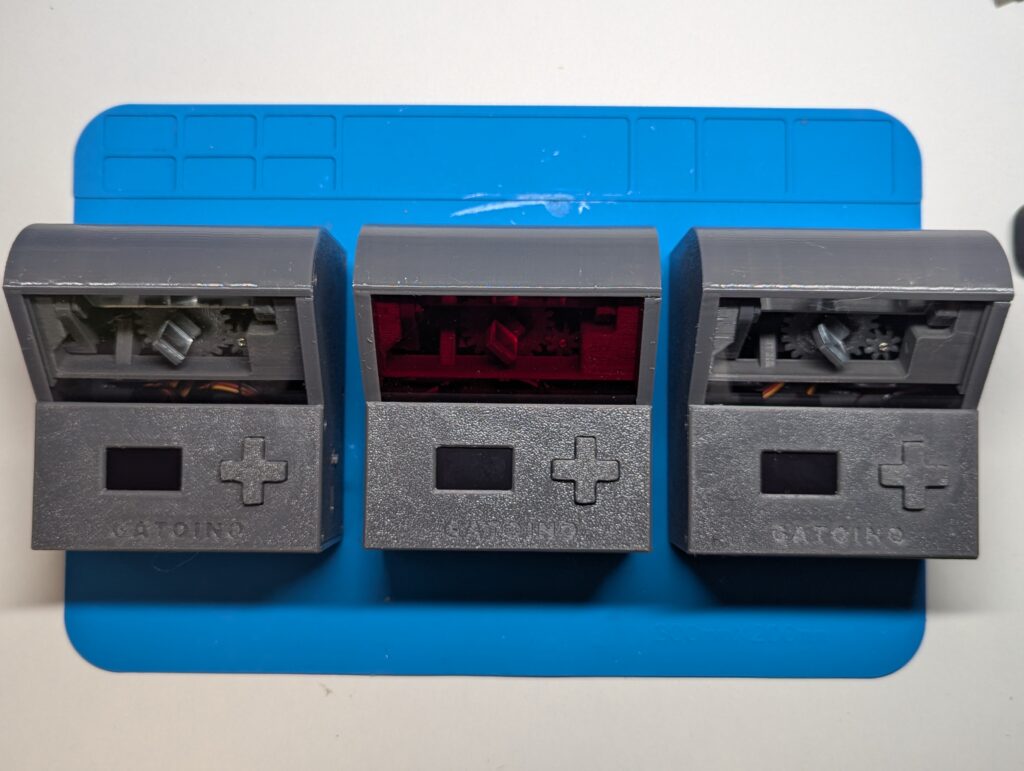
Gatoino’s electronics consist of large, discrete components that are easy to solder even for a complete beginner. No tiny chips with even tinier feet you need to worry about.
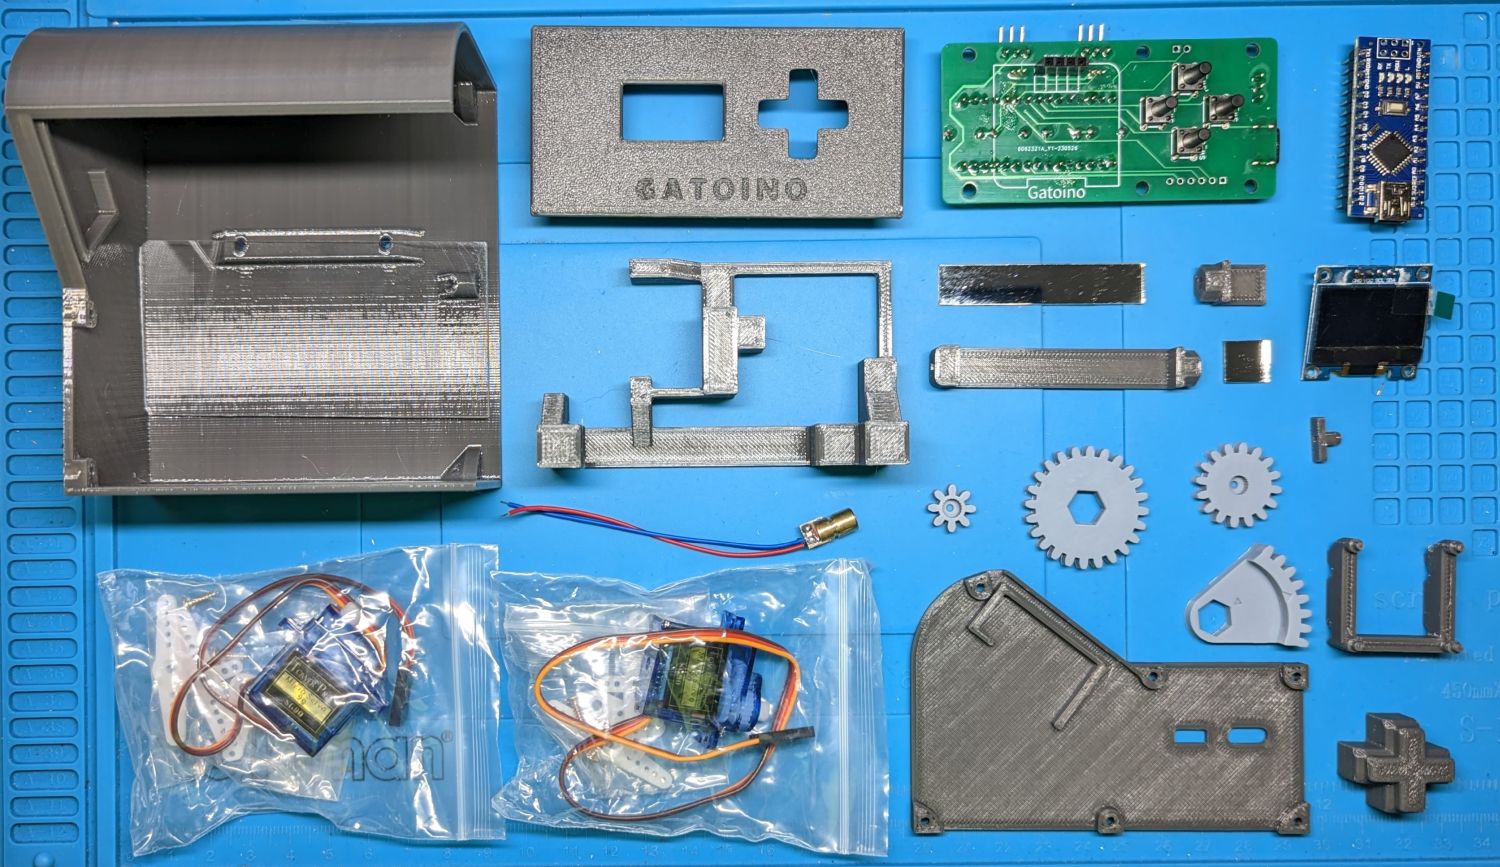
Easy to assemble
Only around a dozen printed parts, two servos, two mirrors, some electronics, a few screws and, of course, a laser are necessary to assemble a Gatoiono.
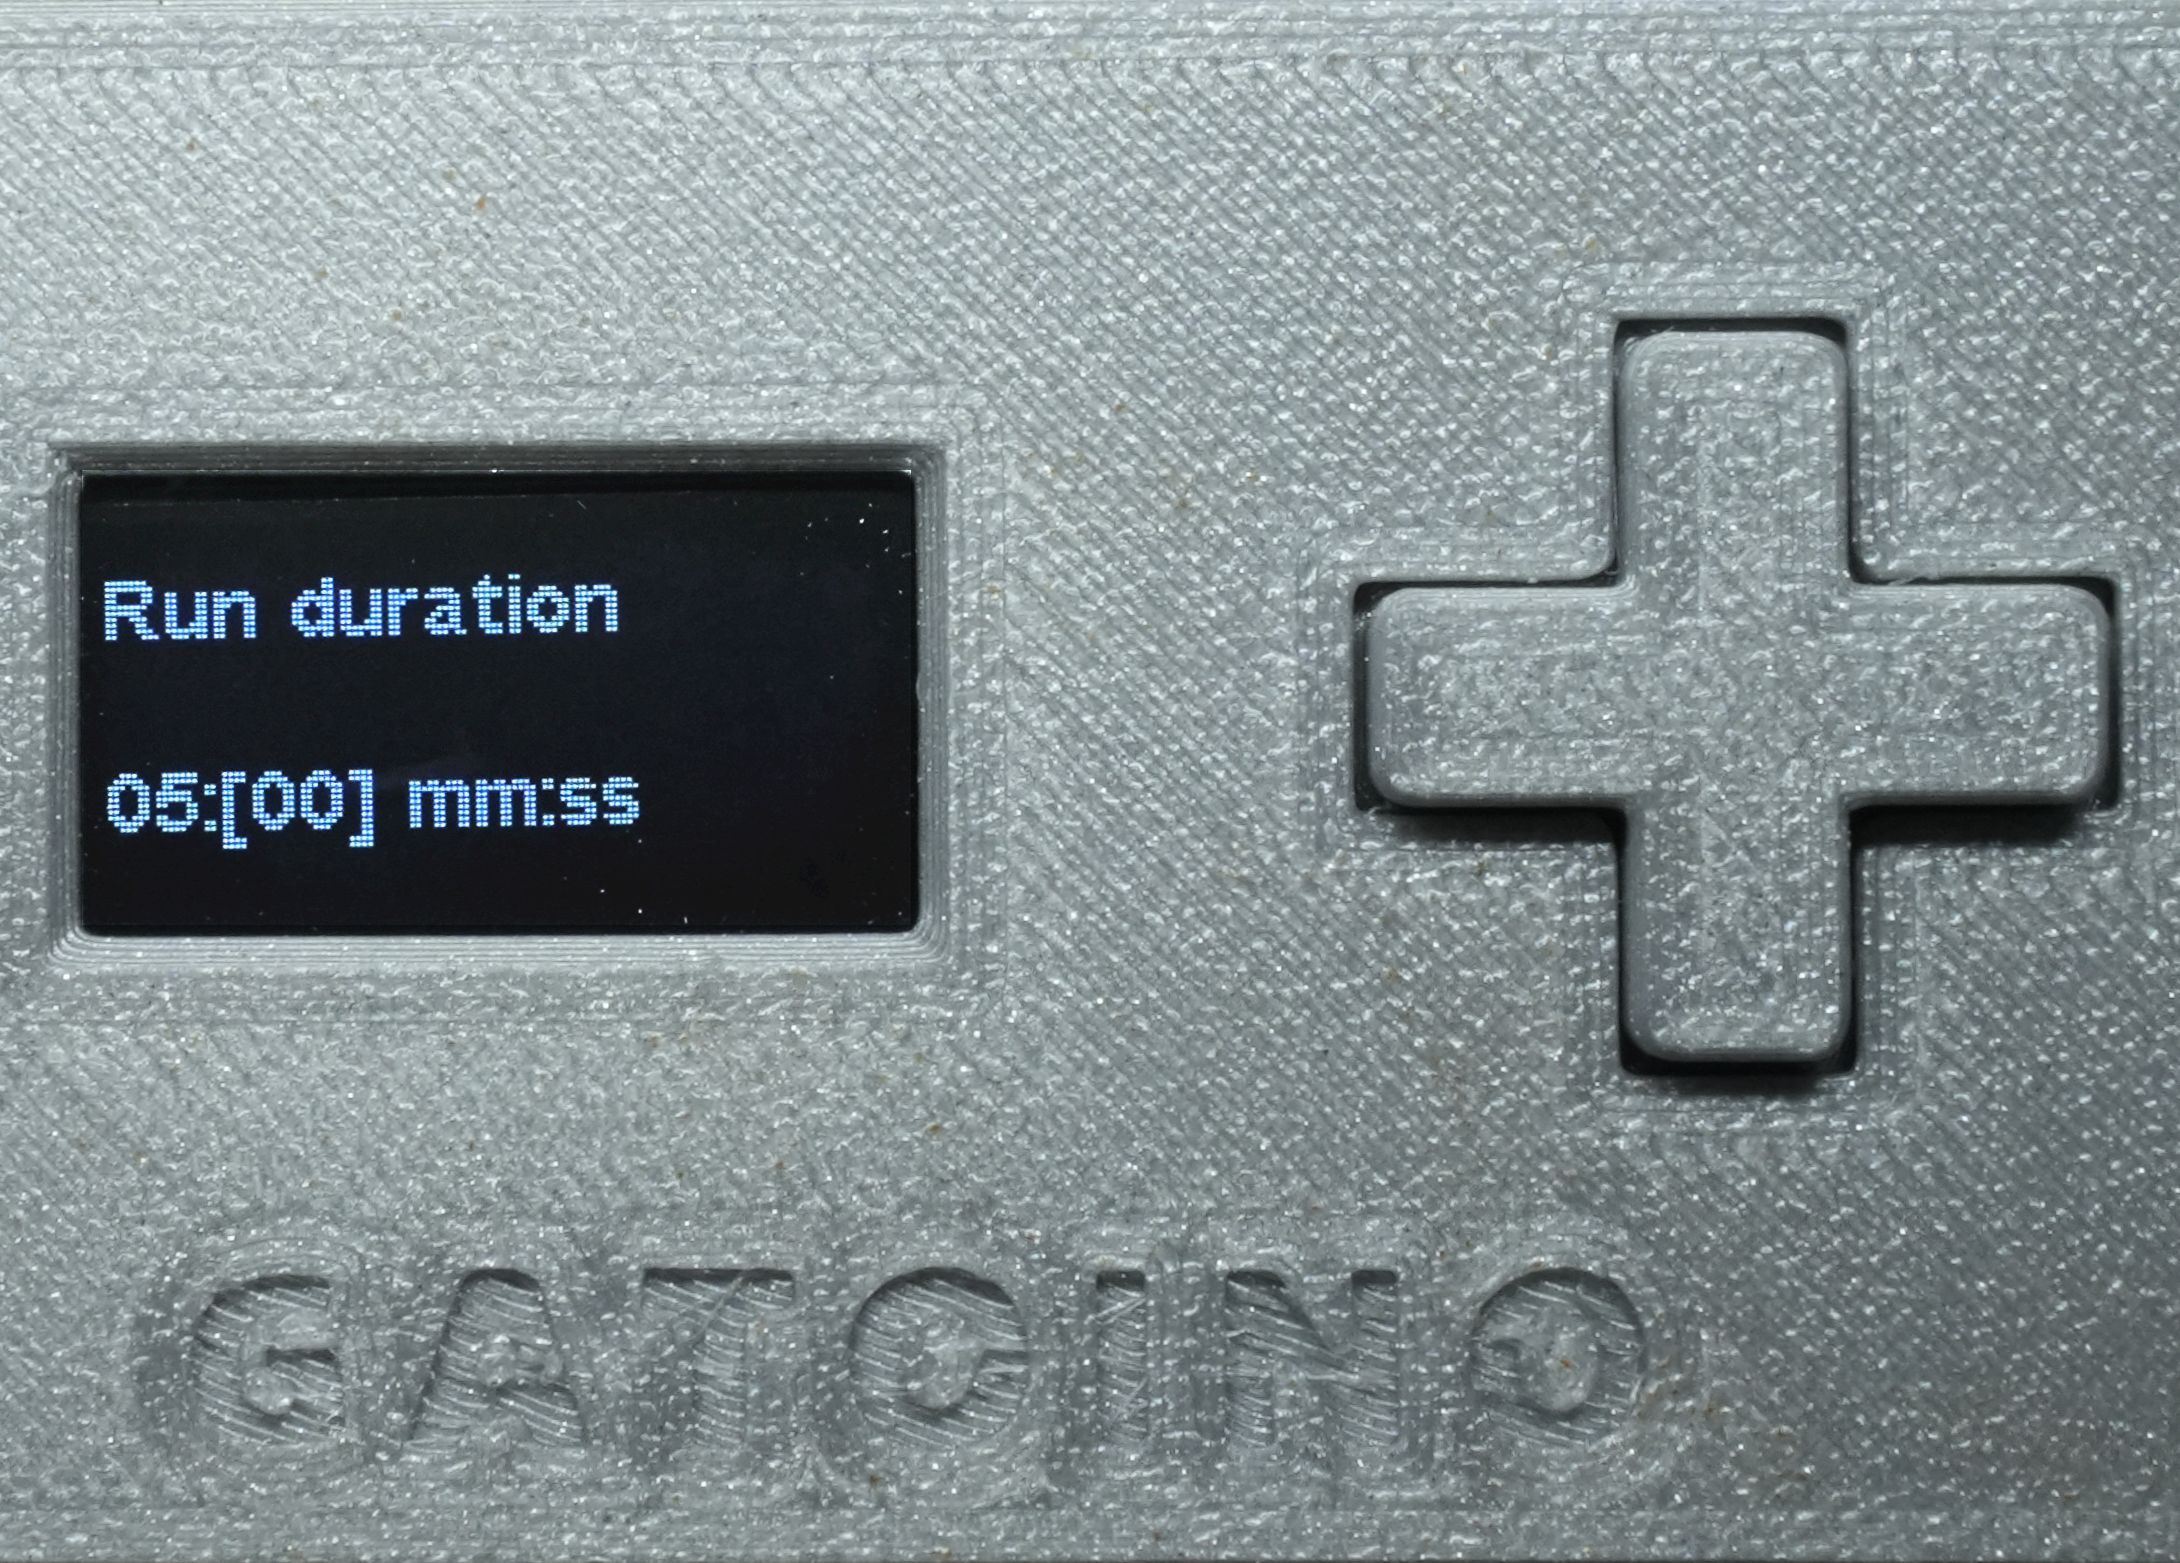
All settings are done guided on screen with a directional pad. No need to figure out complicated key combinations.
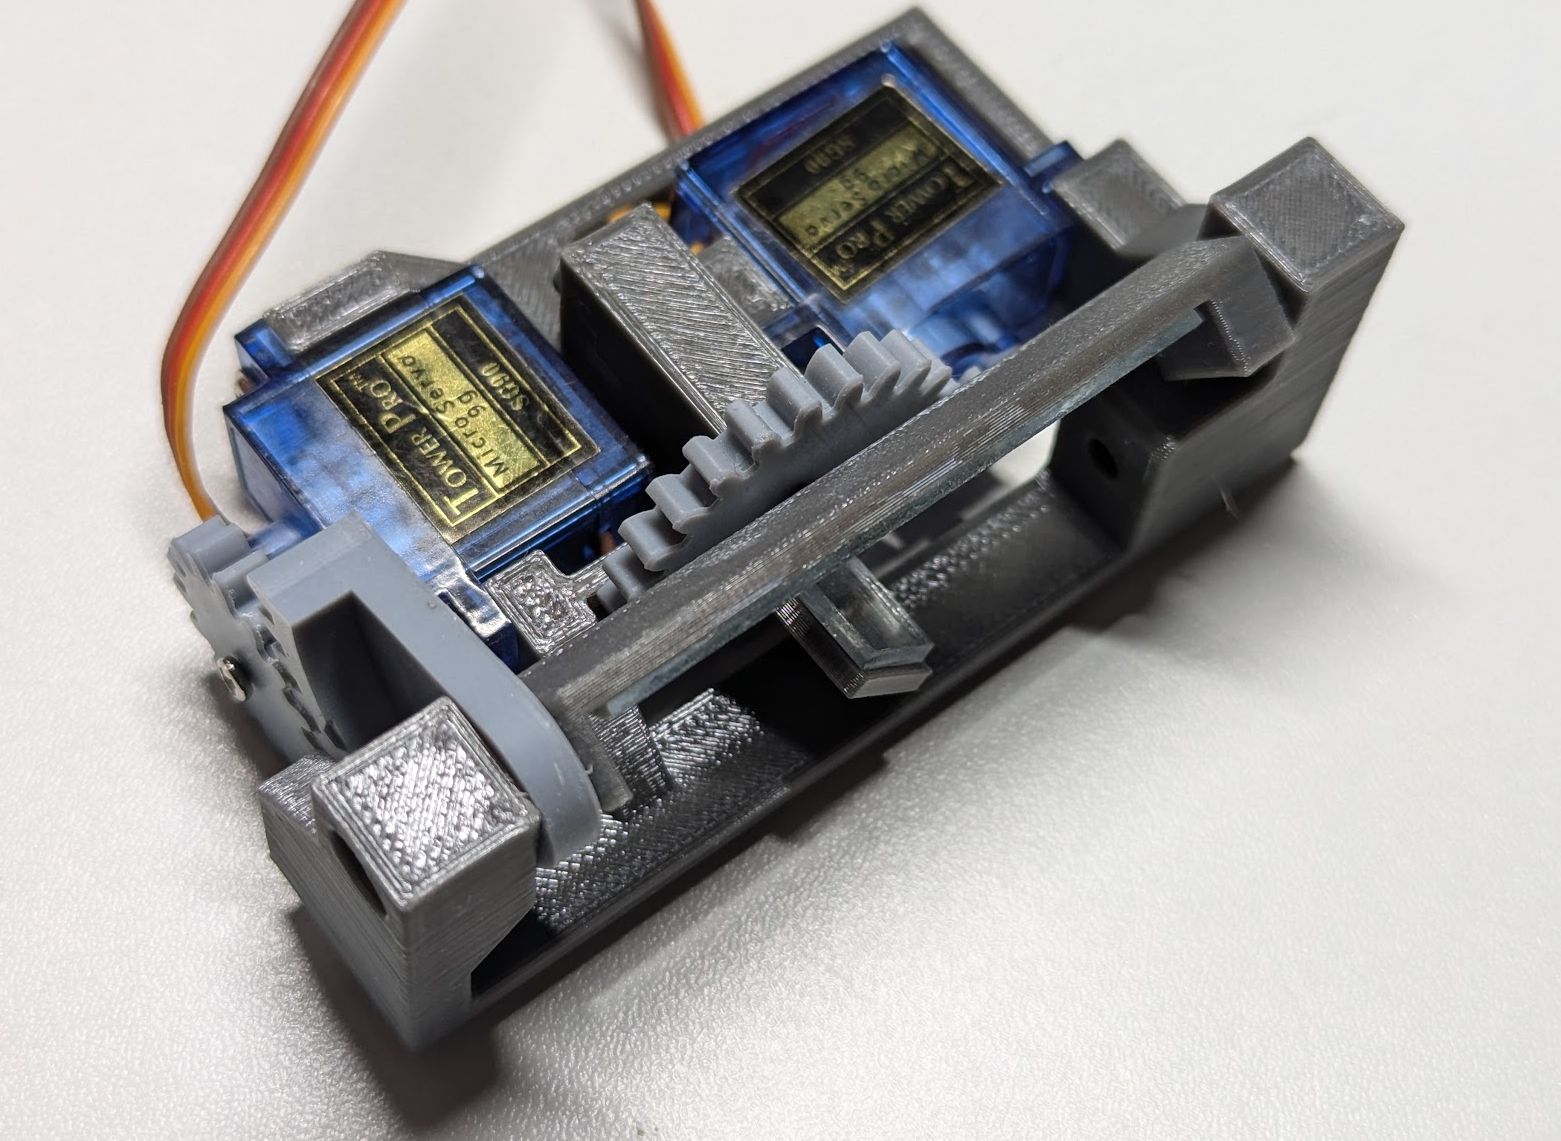
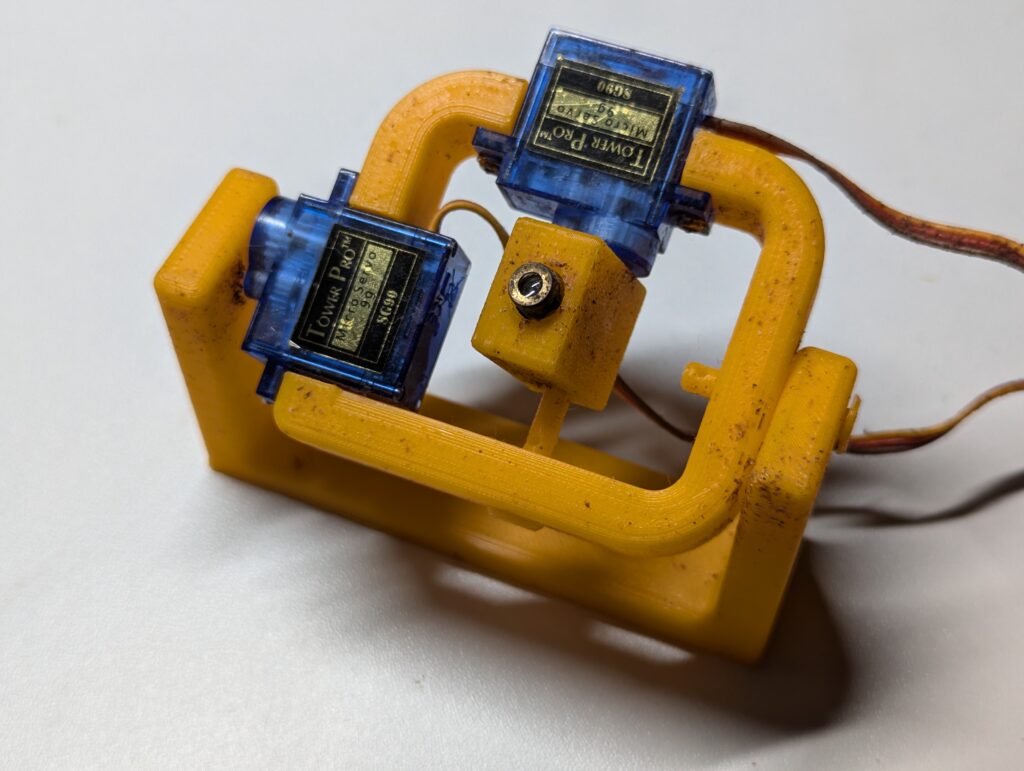
Independently controlled axis
Movement is achieved via two independently controlled controlled servos. This enables movement in any direction at any speed is.
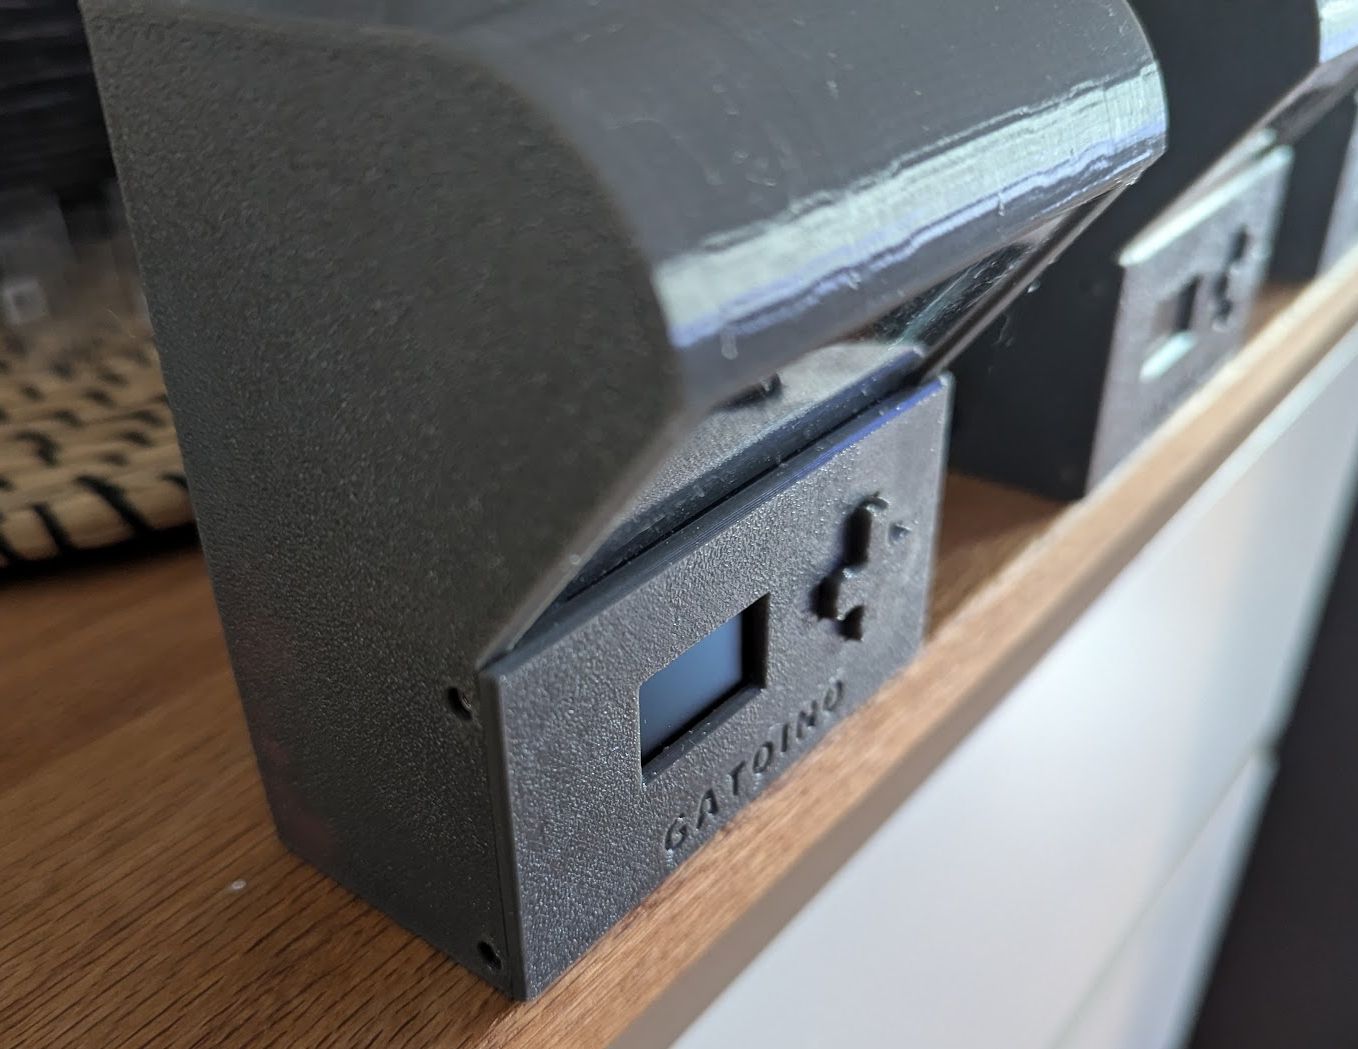
Put it on a shelf
Because the laser can shine straight down Gatoino can works perfectly on front edge of any shelf.
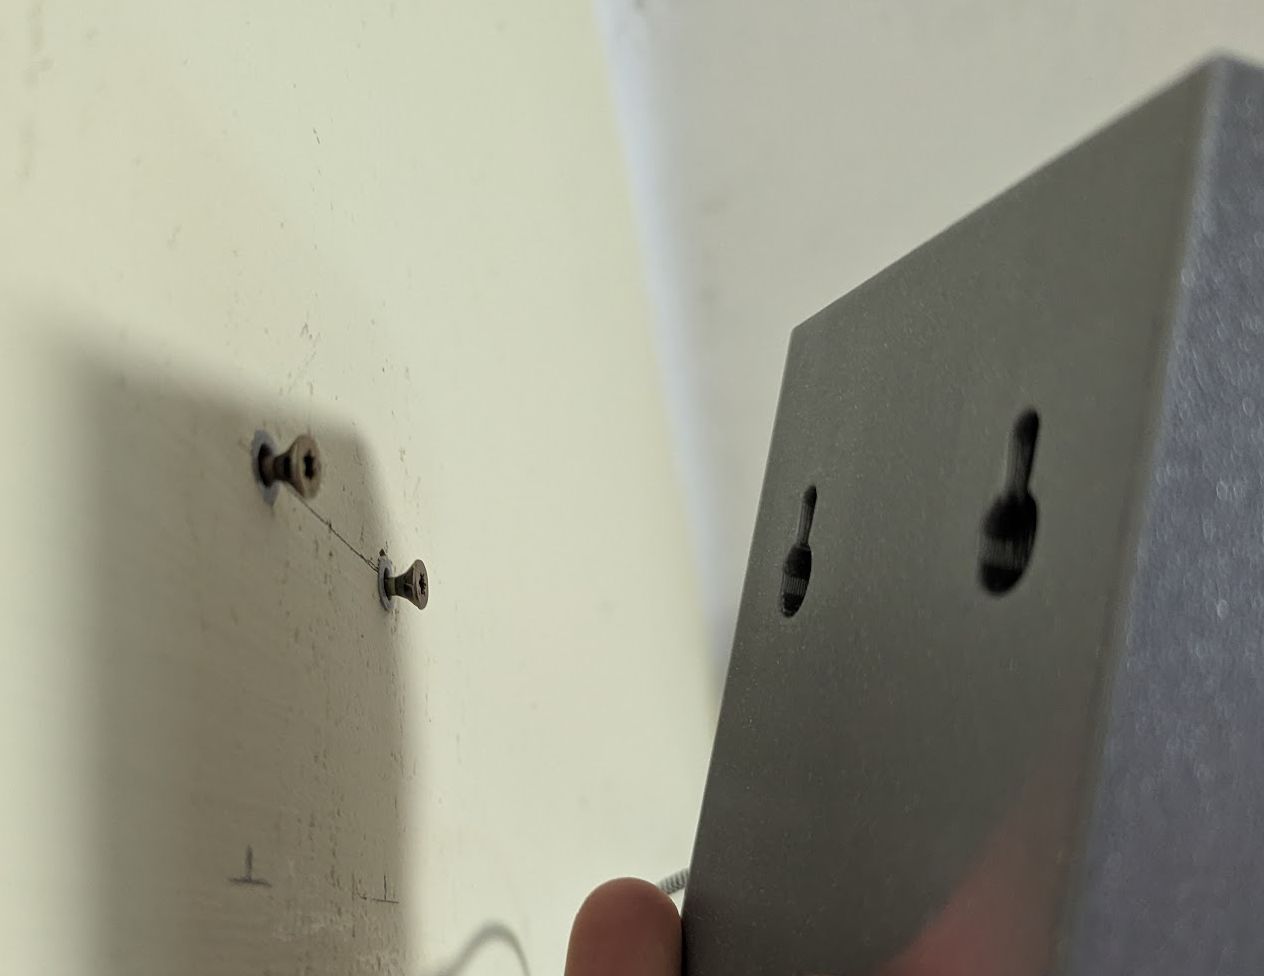
Put it on the wall
You can also use the holes in the back of the case to mount Gatoino to the wall. The higher it’s placed the greater the area it can cover.
Gatoino is for you if you…
It’s NOT for you if you…
What exactly do I need to build one?
You can find the exact parts needed in the Bill of Materials. It also contains links to all electronic components needed. You can also check out the complete assembly manual and the build tutorial video upfront to see what you’re signing up for. Besides the parts these are the tools you need:
OPTIONAL: Something to cut the acrylic glass for the front window like a saw or a laser cutter. You can also order it cut to size or just leave the window out. It’s not mandatory, just keeps the dust out.
What’s in the package?
First of all: Don’t worry if you never ordered a PCB or flashed an Arduino, everything is explained in detail in the assembly manual.
What our key users have to say
Without me Gatoino wouldn’t even exist! I’m in charge of quality assurance, enforcing deadlines and chasing lasers
Wanda
Project Manager
You can’t fool me with your silly games, I easily caught that thing a million times already! Even one paw is enough…
Susi
Ambush Specialist
I don’t know what that thing is or where it came from, but I swear one day I will catch it! Dang it, where did it go?!
Cosmo
The simple path to catisfaction
Order the parts and
the bare circuit board
3D print the case and
flash the software
Solder the electronics and
assemble the device
Let your cat enjoy countless
hours of laser fun!
A bit of history
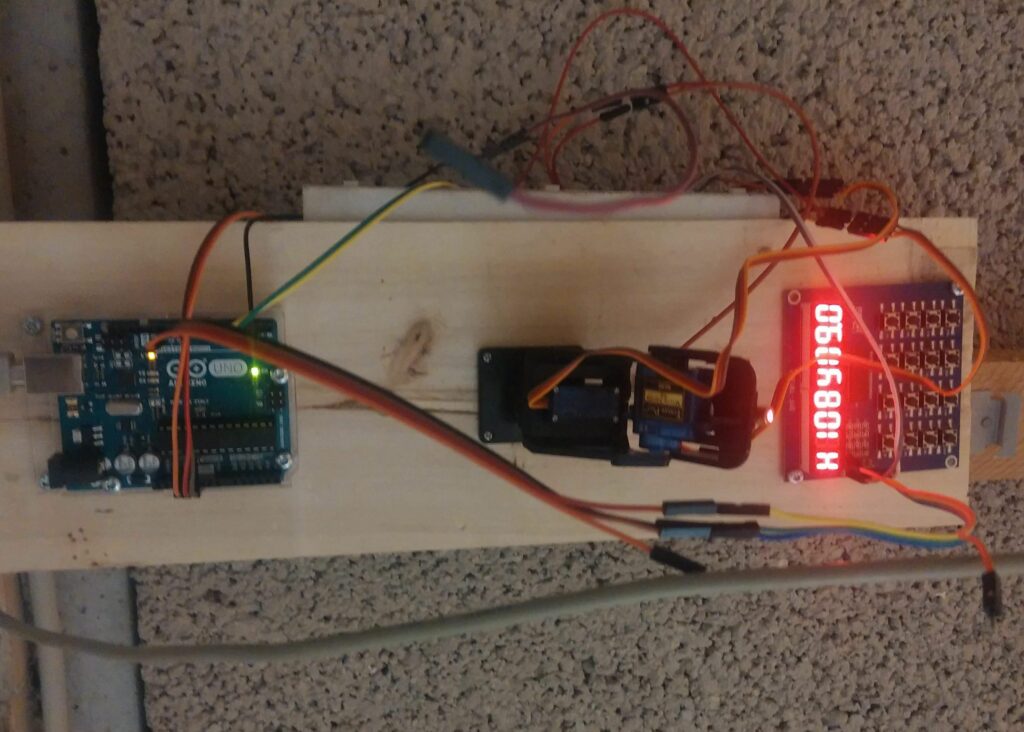
The very first prototype was built from a servo controlled camera mount sold as an Arduino accessory for moving webcams. It could only rotate and swivel but it was OK for a prototype. I combined it with a 8-digit shield to display the curent servo position. Screwed to a piece of wood and mounted to the ceiling it could only move in a hard coded “back and forth” pattern but it clearly showed our cats like to play with it.
Fast forward a year to where I bought my first 3D printer. One of my first own designs was a motion system for the laser which can be fed with X/Y coordinates. With this I could write a truly random algorithm to move the laser. I also included a wake up timer. Everything was still hard coded back then. The cats didn’t mind since they can’t read code anyway.
Fast forward a few years again. The initial prototype was still running fine but it was neither a compact design nor pretty to look at. After several failed attempts to make the initial design more compact I stumbled uppon something new. For laser shows something called a “galvo” is used. Those things are expensive, but the general idea of using a mirror was perfect. Since I don’t need high speed movement I could still use servos. I designed a mechanical proof of concept to see if the idea works out, and it did indeed work! The path for a more compact design was set.
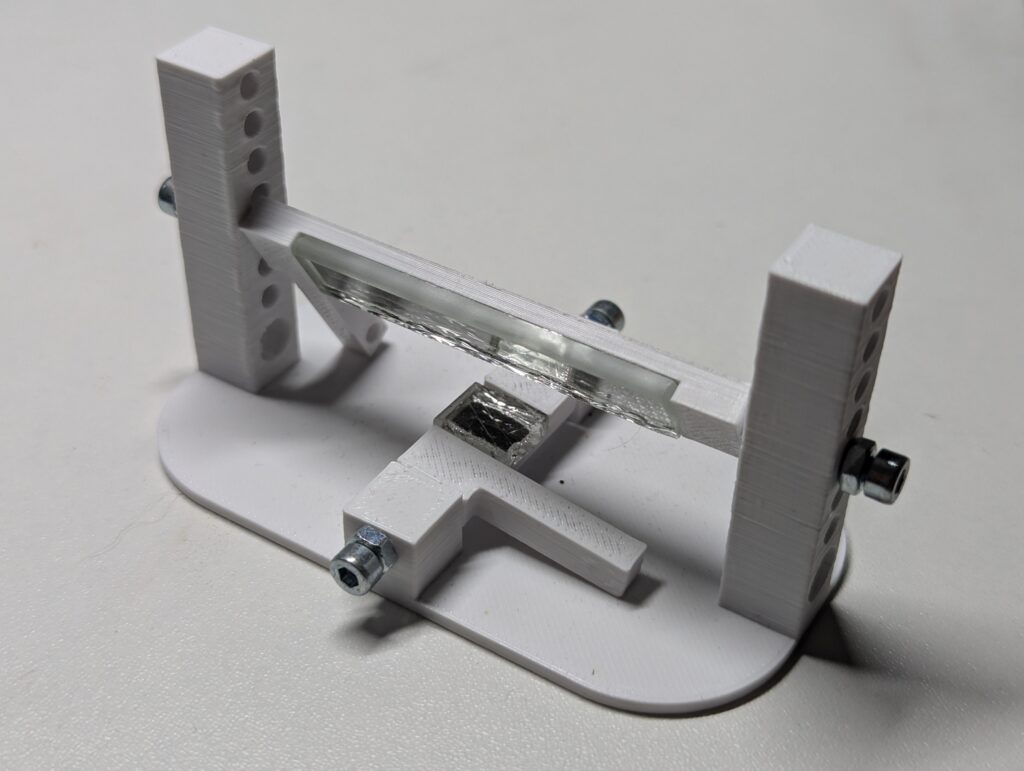

My first idea for how to move the mirror axis waas using rods, like servos for RC cars usually do. I couldn’t find a good way to integrate them though since I wanted the mirror to only move about one third of the servo movement, which would make a rather long arm on the mirror necessary. Another idea was to use rubber belts, but not only are those rather expensive, they also suffer from wear and aging. I disregarded the use of simple gears for a long time since the gear for the upper mirror would need to be pretty large. It took me quite a while plus the help of a friend to figure out I could just use a partial gear.
With the general mechanics figured out and the prototype board working it was time to integrate the electronics neatly into the case. The board also got a few upgrades like reducing the power draw by shutting down the servo power connection in stand by using MOSFETs. The software was improved over a few iterations to make use of the recently added display. The old movement algorithm also got completely rewritten. Instead of hard coded values it was now possible to configure everything in a user friendly menu. Finally a splash screen was added to unmistakable tell that the device is ready to go.
Skip the hard part
You don’t need to invest months to design an develop your own. Get the complete package with everything you need, a written manual and detailed build video. Start building your own Gatoino today!
Legal disclaimer
You may alter any file provided for your personal use. However, you may not distribute those files without my consent. Selling any parts produced from the provided files as well as a complete device is prohibited. Gifting physical parts to family and firends, free of charge, is allowed.
The resulting device from these files has been tested continuously for months on end and proven to work. However, I can not vouch for the quality of self sourced parts. The DIY nature of the product makes replacing defective parts like servos and other electronics easy. I can not provide extensive troubleshooting advice though, analysing and fixing issues is up to you.
All files are provided ”AS IS”. Other than as provided in this agreement, Small Batch Factory makes no other warranties, express or implied, and hereby disclaims all implied warranties, including any warranty of merchantability and warranty of fitness for a particular purpose.